Close To My Heart

Wednesday, February 26, 2014

Skylark Pinwheel

I just got the retired Pinwheel stamp of the month set from another consultant and got excited to use it. I've been challenged by the Skylark paper design and so I thought I'd give it another shot. The layout of this card was inspired by a Kiwi Lane layout using Sentiments and Rings. I am a big fan of Kiwi Lane and use them primarily when I do my scrapbooking layouts. They have the mini versions which you can also use for card making and sometimes when I'm in a hurry or stumped for ideas, I grab my Kiwi Lane kits.

I inked the edges of all pieces using Tim Holtz Old Paper ink just to give it a little vintage look since that's what comes to my mind whenever I see the Skylark papers. I probably inked a bit too much on the circle while I was watching TV and just got lazy correcting it so bear with me on that please. The Pinwheel was stamped using Desert Sand and the sentiment using Saddle. I love CTMH inks as they coordinate easily with the papers. They are easy to clean too and makes really good impressions once you stamp.


Here is the stamp set that I used. It is retired so it's not available on my store anymore but if you're interested leave a comment and I'll find one for you. The papers are available on my site for your purchase.

Pinwheel (S1305)


Butterfly Kisses

Here's a cute card I made using Stamps of Life's butterfly2build stamp set. This is a standard A2 card size (4.25"x5.5") and the background papers I used came from my leftover Simon Says Stamp January 2013 Monthly Card Kit. Yes it's pretty old, but I was cleaning up my closet to make room for more CTMH products coming in and I chanced upon this kit which I had barely used. The stripes on the left corner came from the Lily Bee 6x6 Patterned Papers set, and the big piece is Bazzill Night Mist cardstock I believe. The pink paper that's like a ribbon background is just scrap paper, and I used Neenah Natural White cardstock to stamp the butterfly on. I used CTMH black ink for the butterfly outline and Hero Arts Shadow Tone Bubble Gum for the body. Turned out pretty nicely tying in with the pink scrap of paper.


Happy Birthday Gift Tower

Made a quickie birthday card for a co-worker of mine. Used scraps I have and a Hero Arts Birthday Gift stamp. Colored it using a mix of Memento Markers and Distress Markers. I just got my first set of Distress Inkers today and thought I'd try them out. I've heard so much about it but I have to say I was disappointed by it. The colors weren't that vibrant, and I found myself using the Memento Markers to color over it again. I will have to work on that again. Maybe I have to use watercolor paper? Not sure.

Anyways, here's my birthday card. I background pink paper I think was from one of the DCWV stack. It was leftover scrap for when I did my daughter's birthday party favors tags. I rounded the corners of the tag and embellished with a couple of gemstones hoping to make it pop.


Sunday, February 23, 2014

Cloud Nine - Love You

I received an old Cloud Nine Cardmaking Kit today from another consultant and tried to create something out of it. I saw this kit back when I wasn't a consultant yet and have always been drawn to the bright rich colors that are part of this kit. The recipes provided didn't really catch my eye and I thought I'd go do something that's a little more subdued and clean looking.


My husband asks why my stamping looks off, I told him I do it on purpose and he won't believe me. Granted I could've stamped it harder leaving a better imprint, but I achieved the look I like, which is the wash-out type. Kind of like the rugged piece to an otherwise very simple clean looking background.

Saturday, February 22, 2014

Hello There!

Today I got inspired to do a cheerful Spring themed card using the Lollydoodle paper line. I found out a friend of mine was diagnosed with the big C and felt really sad. Instead of creating a get well soon sad reminder kind of card (which I originally thought of), I went with something cheerful instead.

This is a 5"x7" card since putting the owl on a branch with the bunch of flowers at the bottom needed a bit more room so I made it a bigger card base. I used 2 layers for this card, both from the same B&T paper which I just layered back and forth to create a decorative frame for my picture. I stamped all my pieces first starting from the bottom up. Flowers first, then tree bark, then owl. I did the sentiment at the very last and used a Sizzix die (can't remember which set it's part of) to cut it. After stamping I used Pear Ink to work my way up so it'll have a grassy look. I was careful not to rub in too much or make too big of a circular pattern so it wouldn't affect my flowers too much. I used Sky Ink for the sky, and made the out edges of the sky seem a bit darker. As I worked my way in I tapped on the ink pad only once, just so I get a very light clear day looking type of clear blue sky. After that I started coloring the flowers and shrubs. I used a mix of Spectrum Noir markers and just plain colored them. Since the images are too small shading probably wouldn't matter much in this case. But then again what do I know I'm not really an alcohol marker expert yet. I did color the tree branch with a little more brown just to give it more color 'up there'. And on the sentiment tag, I did a couple of passes of color on the background of the card stock using Tim Holtz Distress Ink in Tattered Rose. Just very lightly, so it doesn't strike as plan, and then I inked the edges of the tag a bit heavily. I used Sorbet Ink to stamp the sentiment.


For this card I used:
A Flowering Bunch (S1306)
Owls (B1450)

Lollydoodle WOTG Cardmaking Kit (G1080)

Thursday, February 20, 2014

Love You

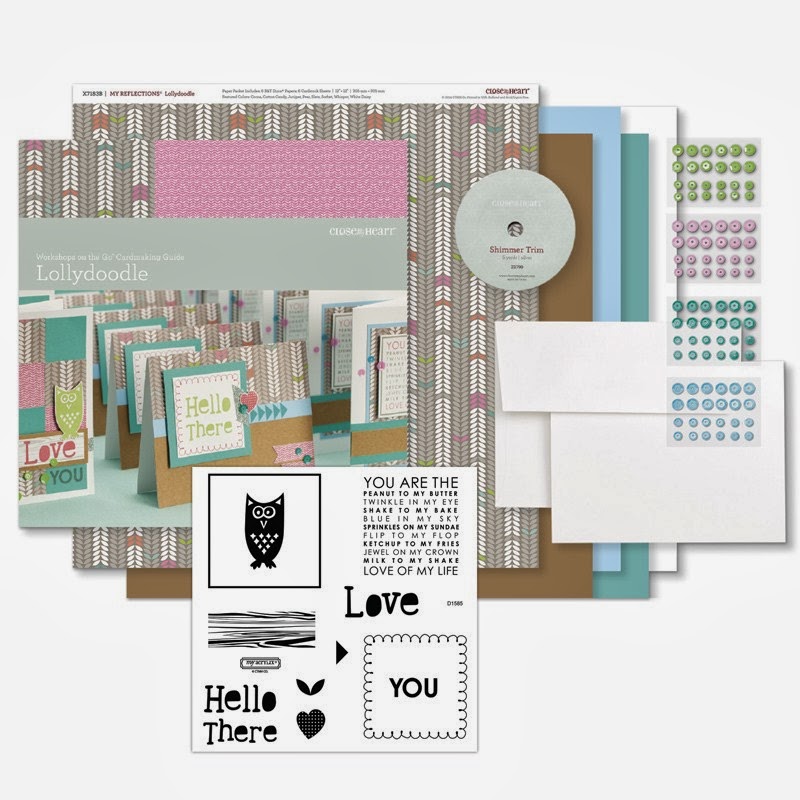
Today I finally gave in and tried the Lollydoodle paper pack. My stash arrived earlier this week and I've been looking at it but didn't feel like opening it. It was too pretty to look at I just wanted to keep and preserve it! The Lollydoodle has such an amazing design, so unique and fun and "spring-y" if you know what I mean. Though I am lucky to live in California (as long as I don't think about the taxes) and not go through the polar vortex, I think I also want for Spring to arrive. And what better way to represent that than to take out and use these Lollydoodle papers! Anyway, this is going to be quick as this was meant to be a quick on the go card. However I must admit I was stumped in making the ribbon. I know I know, it looks so simple yet with just my no-so-deft fingers, it did take awhile to get to the right size without wasting too much ends, and pinning it down on the paper. So, regular brown ribbon to go with the regular scrap brown paper I had left, stamped both sentiments using Cocoa Ink and attached little flowery brands on my "love you" sentiment to add dimension other than the ribbon. Since the background paper is a bit loud, I chose to minimize and not add any more dimensional elements to it. I used 2 stamp images. The 2x2 sized YOU ARE THE stamp is from Lollydoodle WOTG Cardmaking Kit and the "Love You' sentiment is from Affection stamp set. All supplies available at my store so I hope you'll like it and pop in to shop!


Here's the stamp set I used to stamp the "love you" sentiment. Isn't it cute? I can think of a million other ways to use this!

Affection (C1441)
Here's the kit I used for this card.

Lollydoodle WOTG Cardmaking Kit (G1080)


Wednesday, February 19, 2014

Oh Happy Day!

I thought I'd make use of some of my scraps to make a birthday card today. I was inspired by one of the card patterns from the Originals book, but I tweaked it a bit since I did not have a lot of embellishments on hand. The scrap paper I used came from Colorbok Hootenany Designer Paper collection. It's a cheap pad I got from Wal-Mart some time ago. The pink was just an ordinary Recollections card stock. The flower embellishments were die cuts using Stephanie Barnard's latest products Mini Flower Dies. I absolutely love love these dies! They are just so cute! I topped them with some brads I got for free.

I embossed the top of the cupcake using my Cuttlebug and used actual cupcake wrapper on the bottom. I couldn't quite get the effect I wanted using the design on my Artiste cartridge so I decided to just use the real thing then! I used a white card stock and Tim Holtz Tattered Rose distress ink for the cupcake background, then stamped the stitch design using CTMH's Stitch Wonder stamp set. I then added some red and white stones and stamped Oh Happy Day sentiment from CTMH's Cricut Artiste Celebration stamp set.

Hope you all like it!


Tuesday, February 18, 2014

So Amazing!

I'm still in my experimenting with new papers week and today I used Ivy Lane to make a simple but girly card. It's such a pretty paper and I wanted to keep it simple so the focus will be on the unique floral colors.

I stamped my sentiment using Cocoa and Pear Ink, and Hollyhock for the tiny flower in place of "o". I used some scrap paper I had left over to do the flourish border and tag layer. It's one of my fast, simple and classic quickie to do cards.


Here's what I used to make this card.

Ivy Lane WOTG Card Making (G1079)


Sunday, February 16, 2014

Live In The Moment

This is my first stab at using the CTMH Skylark Workshop On the Go (WOTG). I must admit I found one side with all the birds design challenging so I flipped and use the background side instead. I used ordinary cream colored card stock as my base, and layered it with Kraft card stock before adding in my CTMH paper. I fell in love with the Skylark Scrapbooking Workshop stamp set that has the big "LIVE IN THE MOMENT" on it. I used Tim Holtz Distress Ink in Forest Moss to add some colored texture to the card where I have the bird stamp cut out. I used the Believe In Yourself stamp set for that. And lastly, to round off the card, I added in faux stitch look using a stitch pattern from the Stitch Wonder stamp set. Don't you just love how 'rugged' looking the text "Live In The Moment" look?

I almost forgot, I used CTMH Saddle Ink for the bird stamp and Memento Tuxedo Black for the sentiment and stitch. I'm still waiting for my order of CTMH black ink pad to arrive so this will have to do for now.


Here's a list of CTMH products I used:
 Skylark WOTG
Skylark WOTG (G1072)

 I Believe
Believe In Yourself (C1574)
 Stich Wonder
Stitch Wonder (C1564)


CTMH Wild About Love

Here is my February's SOTM creation. It admit it is my first time to use CTMH products (inks and stamps) + Cricut die cut shapes, even acrylic blocks! I had a bit of a hard time stamping so please forgive the inconsistencies. I absolutely love this stamp! The fox designs are so cute! Since Valentine's Day is over, I thought I'd skip the I Love You's and create something different.

I used ordinary white  card stock as my base, then some tan paper from Heritage. I added in this beautiful colorful and flowery card stock from Ki's Growing Garden paper pad. I stamped the foxes with CTMH Exclusive Inks Hollyhock. I stamped on the female fox once, and twice over on the male just to get a darker shade. I used Cocoa ink on the tree bark and Wild Thing stamp. I used Cricut Artiste Philosophy to cut the tag. I then used a regular brown pen to put the faux stitch lines on the top and bottom as borders.


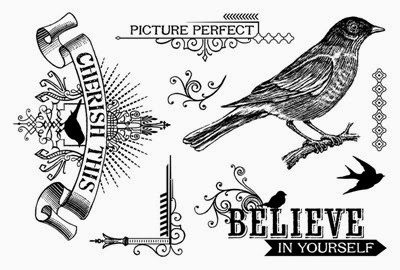
Here is the complete image of this month's Stamp of the Month.


Hope you all like it!

By the way, if you'd like to get your hands on this stamp set, it's only $5 if you purchase $50 worth of CTMH goodies!

Wednesday, February 12, 2014

Stamps Stash

So, barely a week being a consultant and my stash is growing. Scares me to think what it'll look like next week, a month from now, 6 months from now. This is how it looked like when I started - 2/8/2014

Now in a few days time, this is how it looks today. 


Holy cow! The people weren't kidding when they said be prepared for storage issues!! And that's not even counting what's inside the CTMH shipping box!!

OK, now that I have all these wonderful stamp sets and papers and kits, it's time to start creating! 

Tuesday, February 11, 2014

Critters Galore!

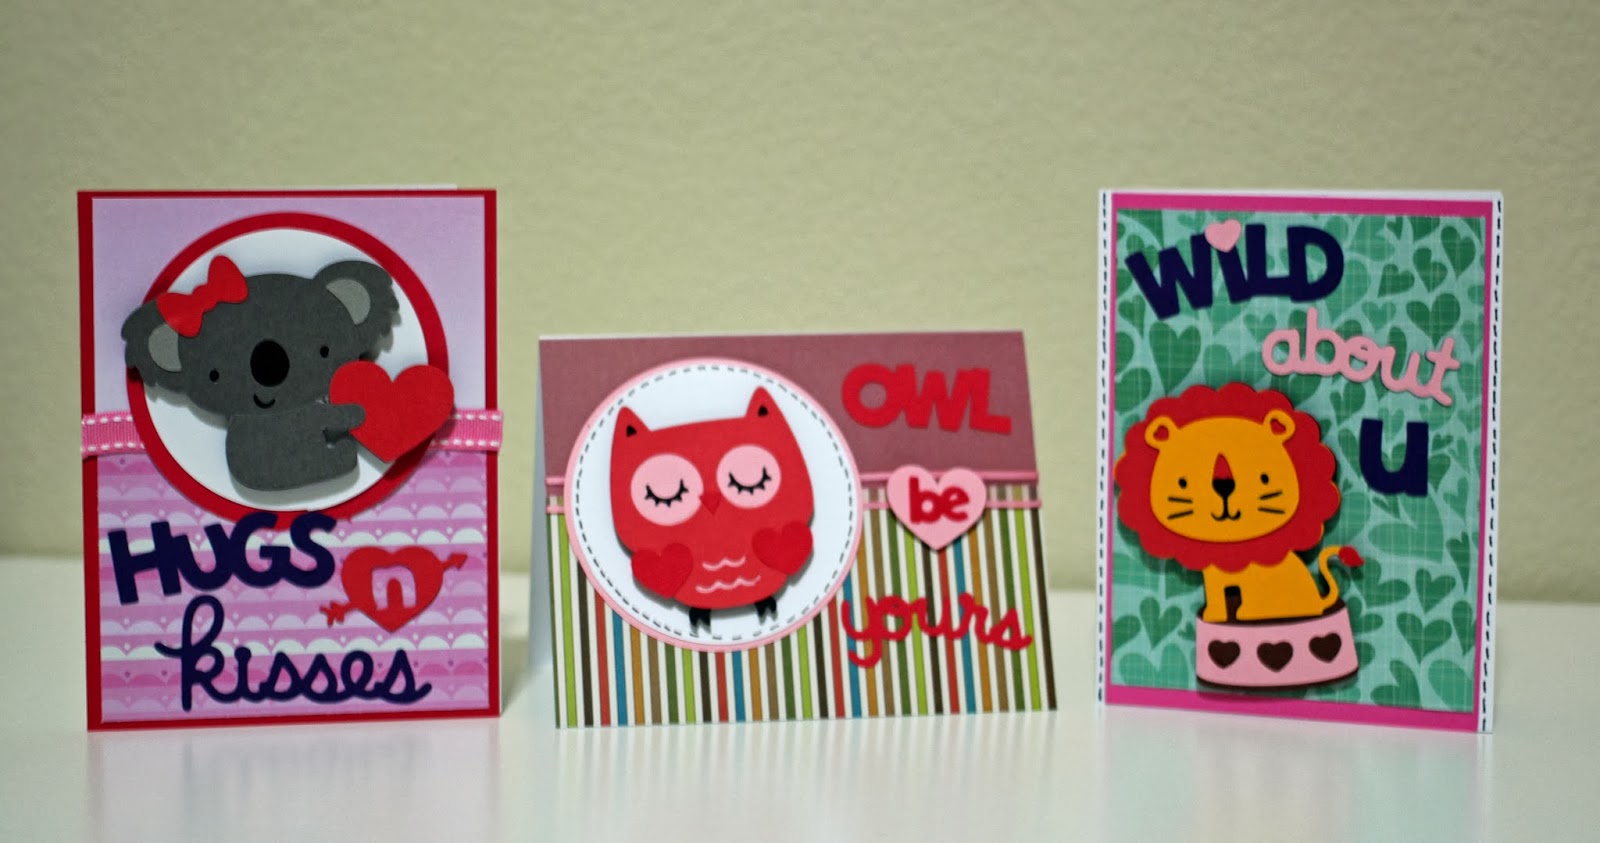
Valentine's day is just a couple of days away and I'm scrambling to make cards for my daughter's class. I chose to do critters so the kids will appreciate it and at the same time hopefully becomes a 'tool' to learn animals. She's turning 2 soon and the toddlers in her class are in that stage of learning animals and sounds they make. It took so much time to put these together, but it was well worth it! My daughters reaction was of pure glee when she saw these critters, and we had fun identifying them too.
Cricut's Create a Critter 2 cartridge is so much fun to use! The animals are so cute! The themes are also perfect for Valentine's Day! I should make a mental note to use them more often, even for other occasions. I underestimated the time it takes to create these. Now I know better and hopefully can plan ahead the next time!
Enjoy!


Thursday, February 6, 2014

Close To My Heart

After deliberating it for quite some time, I have decided to finally take the plunge and be a Close To My Heart Consultant. I am so excited and cannot wait to receive my Consultant Kit. I own all 3 Cricut Collections from CTMH and I absolutely love them! It's because of these that I got hooked on CTMH products.

Cricut Artiste Collection

Cricut Art Philosophy Collection

Cricut Artbooking Collection

My next mission is to purchase those Workshop on the Go (WOTG) Kits and start following recipes. Looking at the new idea book I am already in love with Lollydoodle Kit! Aren't they the cutest???

Lollydoodle WOTG Cardmaking Kit

Sunday, February 2, 2014

Make A Wish!

It feels good to be able to pick up my Spectrum Noir alcohol markers again and do some good old coloring fun. For this birthday card I used a regular 5x7 American Crafts gray card stock as a mat. DCWV's 6x6 Eat Cake stack has this colorful polka dot fun looking design which I used as a base. Since the background is too loud I layered it with white scrap paper which I punched borders around using We R Memory Keepers Doily themed punched. I then used Cricut's Something to Celebrate cartridge to cut out the "make a wish" sentiment and gift. And my highlight is the Penny Black  Birthday Girl Big Wish stamp set I colored. I love Penny Black's girl stamp sets since they look so jolly, cheerful and they are so much fun to color.

For the hair I blended the Browns  (GB8/10 and EB5). I used the Reds (CR8/10/11) for the hair ribbons except for the middle button which I decided to use a lighter shade as contrast (PP3). For the dress I used the darker shade of Red for the polka dots (DR5/7) and Pinks (PL1/BP2) for the main dress itself. For the Skin tone I must have gone back and forth with the Pale Hues (FS2/FS3) and Yellow CT1, and to top it off I added a light touch of Essentials EB1. The Icing on the cake was colored using Yellow (CT2/1), with the cake itself using Browns (EB5/GB8). Since this birthday cake is for a guy, I decided to color the cake brown for chocolate (his favorite flavor), and the serving platter a touch of blue (TB1). The candle flame was colored using GB5 for an orange glow, and just TB9 for the candles. I haven't colored in a while so forgive me if it seems a bit off. I am obviously lacking in practice, as I seem to have spent so much time lately revisiting my Cricut cartridges and obsessing with K&Company's Smash books.


Saturday, February 1, 2014

You're Invited! Party Time!!

I haven't used my stash of Cricut cartridges in a while and wanted to revisit some of my favorite ones. For an upcoming party I'm planning, I made an invitation card for the birthday celebrant. It'll be a surprise of some sort. Thinking of mailing this a day before the party perhaps?

I used Cricut Birthday Bash cartridge for the little bird and Something to Celebrate for the texts on a DCWV 6x6 Eat Cake card stock, and American Crafts gray card stock as my mat.